JUnit Basic Testing
Hi everyone !!!
Today let's take a look at the very popular testing tool, JUnit. As the name suggests JUnit is a unit testing tool for Java. Without further a do let's jump into JUnit testing.
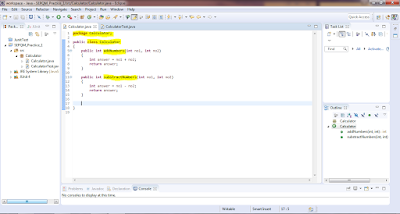
Step 01 : Create a simple Java code in Eclipse. I have created a simple add and subtract method inside Calculator class. This Calculator class lays inside Calculator package.
Step 02: Next create a JUnit test case by right clicking and selecting the JUnit test case under new option. Inside the test case implement method to assert (check) the expected outcome and the actual outcome of the methods which were implemented inside Calculator class.


In the right bottom corner you'll be able to see something like in Step 02-b image. This will give a summary of the JUnit test test. Inside Calculator package there is a class called CalculatorTest which has an object of Calculator class "test" and it has 2 methods,void testAddnumbers() and void testsubtractNumbers().
Step 03 : Right click on CalculatorTest class and run as JUnit test case. You'll be able to see the following result.

Today let's take a look at the very popular testing tool, JUnit. As the name suggests JUnit is a unit testing tool for Java. Without further a do let's jump into JUnit testing.
Step 01 : Create a simple Java code in Eclipse. I have created a simple add and subtract method inside Calculator class. This Calculator class lays inside Calculator package.

Fig 1: Step 01

Fig 2: Step 02-a
In CalculatorTest class I have created an object of Calculator class(the class which has the methods I'm going to test). Next I have implemented 2 methods to test the addNumbers and subtractNumbers methods in Calculator class. To make this as testing methods I have used @Test annotation. Here both the methods in Calculator class is returning an integer value, which will be the actual output of the unit(in this case it is the methods).Using assertEquals method I have compared the expected and actual output of the methods.
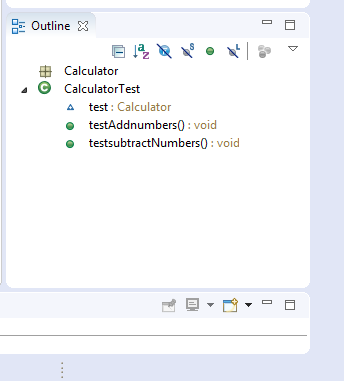
Fig 3: Step 02-b
Step 03 : Right click on CalculatorTest class and run as JUnit test case. You'll be able to see the following result.

Fig 4: Step 03
After executing the CalculatorTest class we'll be able to the output in the console tab. Since the test case was success we won't be able to see any red bars on the left top corner. On the left top corner we can see the time taken for execution and the total number of methods available and the number of methods that were successfully executed.
As you can see that JUnit is a very simple yet efficient tool to do unit testing with all the necessary information presented at the end of executing the test case. I hope that this was very useful for you guys.... So see you next time....... :)


Comments
Post a Comment