RMI - Weather station
Hi friends !!!! :)
Today I like to share one of my projects with you..... It's basically a weather station where weather readings are gathered and updated using RMI technology, Java Remote Method Invocation. The Java Remote Method Invocation (RMI) system allows an object running in one Java virtual machine to invoke methods on an object running in another Java virtual machine. RMI provides for remote communication between programs written in the Java programming language.

I have used Netbeans IDE to implement this system.In this project I have focused on temperature, air pressure, humidity and rainfall of the cities in the country. So by providing the location name we can easily view the above mentioned weather readings time to time. We can further expand this system to a very large project. Since, it's a basic introduction to application using RMI technology let me start off with a very basic system.
There are altogether 8 interfaces implemented in the system. 4 of them are listener interfaces of each of the weather factors mentioned above and 4 of them are for the sensors interfaces of the weather factors. We have a server class and a monitor class. In server class we'll be getting the readings and send them to monitoring stations in a timely manner. Monitors will display the readings sent by the server.
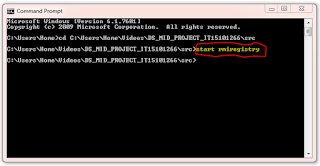
In order to run the RMI project first we have to start the rmi registry. To start the rmi registry, go to the folder where you have created the project and go to the src folder. From there open the command prompt. compile all the files in the project and create stubs for server and client(in our case it's the monitor). Next type start rmiregistry in the command prompt and run the server. Next run the monitor and you will be able to see the readings time to time.


Today I like to share one of my projects with you..... It's basically a weather station where weather readings are gathered and updated using RMI technology, Java Remote Method Invocation. The Java Remote Method Invocation (RMI) system allows an object running in one Java virtual machine to invoke methods on an object running in another Java virtual machine. RMI provides for remote communication between programs written in the Java programming language.

Fig 1: RMI method invocation
Since we have the theory background of RMI I thought of sharing my project in which I have implemented a very basic client-server program using RMI to pass information from server to the monitoring station. As we all know in a weather forecasting station we have to gather the weather readings and send them in a periodic manner to all the stations connected to the server. Through this we can invoke methods running in one Java virtual machine through an object running in another java virtual machine. So it is easy for us to pass the weather readings to all the stations.I have used Netbeans IDE to implement this system.In this project I have focused on temperature, air pressure, humidity and rainfall of the cities in the country. So by providing the location name we can easily view the above mentioned weather readings time to time. We can further expand this system to a very large project. Since, it's a basic introduction to application using RMI technology let me start off with a very basic system.
There are altogether 8 interfaces implemented in the system. 4 of them are listener interfaces of each of the weather factors mentioned above and 4 of them are for the sensors interfaces of the weather factors. We have a server class and a monitor class. In server class we'll be getting the readings and send them to monitoring stations in a timely manner. Monitors will display the readings sent by the server.
In order to run the RMI project first we have to start the rmi registry. To start the rmi registry, go to the folder where you have created the project and go to the src folder. From there open the command prompt. compile all the files in the project and create stubs for server and client(in our case it's the monitor). Next type start rmiregistry in the command prompt and run the server. Next run the monitor and you will be able to see the readings time to time.
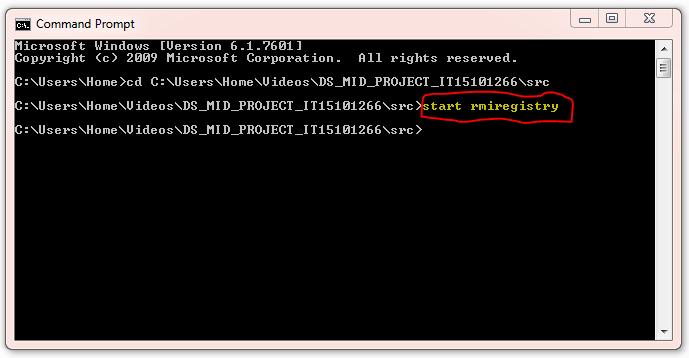
Fig 2: Starting rmi registry

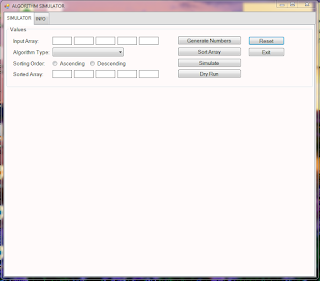
Fig 3: Run the server

Fig 4:Run the monitor
This is just to give a rough idea to start off with a RMI implemented project. I hope that you have enjoyed it..... See you soon.......... :)


Comments
Post a Comment